The AFM8 is worth its cost only when your wiring uses compatible M22520/2-style contacts often enough to justify a controlled, repeatable hand tool. You will be able to identify the correct frame and positioner, set the crimp depth, inspect the finished termination, and compare the complete system cost with a general-purpose crimper or dedicated applicator.
Key takeaways
- Buy the AFM8 for repeatable high-reliability contact crimps, not occasional household wiring.
- Match the positioner, contact, wire gauge, and connector before crimping.
- Use the required selector setting and complete the full ratchet cycle.
- Reject crimps with exposed strands, bellmouth damage, loose contacts, or incorrect wire insertion.
When the AFM8 M22520/2-01 earns its cost
A recurring aerospace, defence, avionics, telecommunications, or high-reliability harness workload can justify the AFM8. Occasional household wiring, automotive repairs, ferrules, insulated terminals, and general-purpose electrical connections usually cannot.
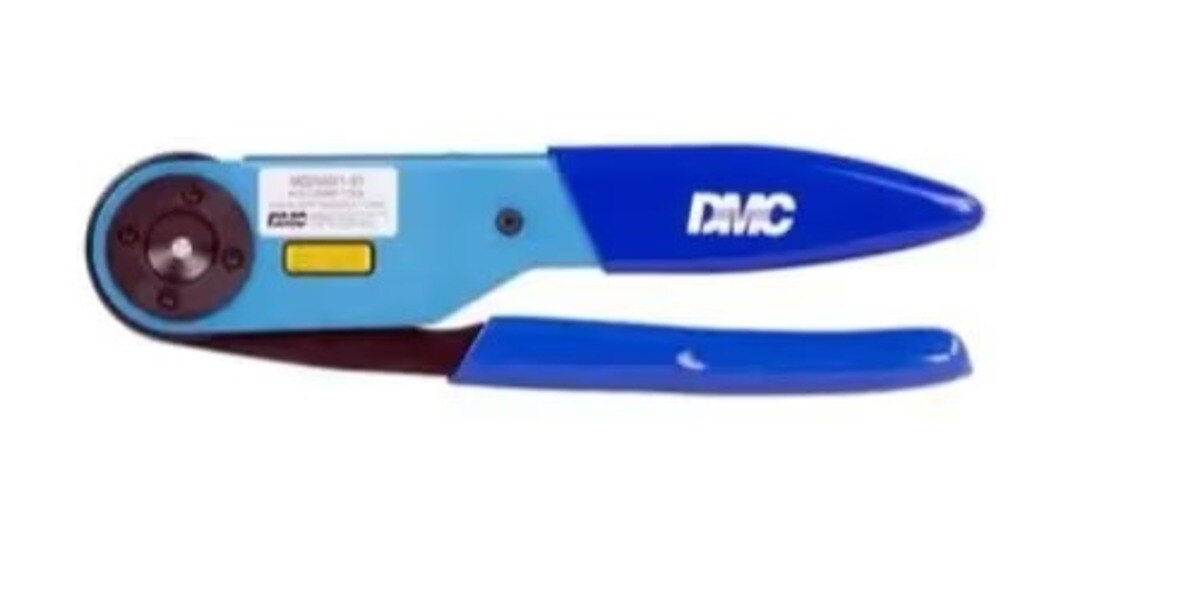
M22520/2-01 identifies the eight-indent AFM8 crimp-tool frame, not a universal finished crimper. The bare frame requires the contact-specific positioner, and sometimes a locator or other accessory, before it can make an approved termination.
Its value comes from ratcheting control, repeatability, and one frame serving several approved contact families by changing positioners—not from being faster or more universal than every crimper.
The DMC AF8 M22520/1-01 is a different tool system and geometry. Do not substitute its four-indent aerospace application for the AFM8’s eight-indent radial crimp, or use either in place of hexagonal dies for terminals that specify them. A neat-looking crimp with the wrong geometry can fail mechanically.
Use this workload test:
- Buy the AFM8 when the same M22520/2-style contacts recur and documented, repeatable terminations matter.
- Choose a dedicated applicator for high-volume production where indexed feeding and process control outweigh flexibility.
- Choose a general-purpose crimper for approved ferrules, insulated lugs, or automotive contacts.
So, is dmc afm8 crimping tool for worth buying? Only with the complete application specified. The afm8 m22520 2 01 crimp tool earns its cost through recurring compatible work, not through the M22520 designation alone.
How to match the frame to the contact, wire, and connector
A compatible AFM8 combination starts with the contact part number, not the wire gauge. The commonly quoted 26–12 AWG range describes the frame’s starting capability; it does not approve every wire and terminal in that range.
1. Identify the exact contact part number and connector family. Check the connector manufacturer’s crimp specification, M22520 tool list, or contact drawing for the approved conductor range, barrel dimensions, and wire construction.
2. Confirm the conductor type, such as stranded copper, and measure the insulation outside diameter. Two contacts accepting 20 AWG wire can require different barrel depths, insertion positions, or crimp settings.
3. Match the contact to its specified positioner or locator part number. A positioner is not a convenience adapter: it fixes the contact’s location and orientation so the eight indents land on the barrel instead of the shoulder, transition, or insulation.
4. Record the selector setting specified for that contact, conductor, and tool combination. The selector changes crimp depth; an AFM8 M22520/2-01 crimp tool does not recognise wire size automatically.
5. Check whether the drawing requires an inspection gauge, dimensional check, or other acceptance test before production use.
6. Reject the combination if any item is missing: contact series, wire construction, insulation diameter, connector family, positioner part number, selector range, or inspection requirement.
That complete combination—not the bare afm8 frame—defines a valid crimp.
How to set and use the AFM8 without guessing
Use the AFM8 as a documented setup, not as a self-adjusting plier. Calling it a dmc adjustable crimping tool for wiring is incomplete unless you identify the contact, conductor, positioner, and selector setting.
1. Read the contact manufacturer’s crimp specification and measure the stated strip length. Strip the insulation without nicking, cutting, or spreading the conductor strands.
2. Fit the specified positioner for the exact contact part number. Insert the contact until its locating shoulder or stop is correctly seated, then keep it straight and aligned with the tool’s indenters.
3. Insert the conductor fully into the barrel. Confirm the specified conductor brush extends at the required point and that the insulation clearance matches the drawing. No strand may fold over the barrel edge or remain outside it.
4. Set the selector to the number specified for that contact, conductor, positioner, and AFM8 combination. The selector changes crimp depth or indent penetration; it does not recognise wire size automatically or make the wrong positioner acceptable.
5. Hold the contact steady and close the ratchet through its complete cycle until the handles release. Do not stop partway or reopen the tool to reposition a partially compressed crimp.
6. Use a locator or additional accessory when the contact manufacturer’s tool list requires it for insertion depth, alignment, or retention. A similar-looking positioner can place the contact at the wrong height or angle, creating an invalid termination even with the correct selector number.
Record the contact part number, wire size and construction, positioner, and selector setting. That record makes repeat crimps reproducible instead of dependent on memory.
How to tell whether the finished crimp is acceptable
A complete ratchet cycle proves only that the mechanism closed; it does not prove termination quality. Inspect the finished contact against the contact manufacturer’s visual criteria, not against confidence in the click or neat-looking indents.
1. Check the conductor brush at the contact’s inspection end. Strands must reach the specified position without loose strands, cut strands, or strands folded outside the barrel. Confirm the insulation stops at the specified clearance from the conductor barrel and that any insulation-support wings engage the insulation without crushing or cracking it.
2. Inspect the barrel from both ends. Look for a controlled bellmouth at the entry and exit, with no split barrel, excessive flare, or indent marks outside the specified crimp area. The eight indents must be evenly distributed around the barrel, with the contact straight rather than tilted.
3. Reject a termination that looks radial and tidy if the contact family, positioner, or selector setting was wrong. AFM8 indents are not interchangeable with hexagonal dies or four-indent aerospace tools, and a neat pattern can still leave the conductor mechanically insecure.
4. Apply the specified verification method: measure crimp dimensions, use the named go/no-go gauge, or perform the required pull test. A conductor pull test checks attachment strength; it does not prove the contact will remain locked in its connector cavity.
Verify housing retention separately, because a sound electrical crimp is still a failed harness if the contact backs out, sits at the wrong depth, or cannot mate correctly.
The real buying comparison: complete AFM8 system or another tool
The AFM8 is worth buying when the same M22520/2-style contacts recur across repair or harness work, because one frame can support several contact families by changing positioners. It is poor value for occasional household wiring or terminals approved for a different die geometry.
Compare the installed system, not the dmc crimping tool price shown for the bare frame.
| Option | Installed system includes | Best fit |
|---|---|---|
| AFM8 system | Frame, contact-specific positioner or positioners, locator or accessories, inspection gauges, calibration, freight, and replacement parts | Low- or medium-volume work using recurring M22520/2-style contacts |
| Dedicated applicator | Applicator, feed hardware, tooling, setup, inspection equipment, and maintenance parts | High-volume production needing indexed feeding and tighter process control |
| General-purpose crimper | Correct die set, locator if specified, and inspection equipment | Insulated lugs, ferrules, open-barrel automotive contacts, or other approved terminal systems |
A low frame-only quote is not equivalent to a ready-to-use kit containing the positioner for a named connector family. Without that positioner, the AFM8 cannot place the contact correctly, even if the frame’s wire-range markings appear suitable.
Before ordering, confirm:
- Contact part number and connector family
- Positioner part number and selector setting
- Approved conductor range and accessories
- Inspection gauge, calibration, replacement-part, and freight requirements
- Delivered price for the complete system
Miracle Tools And Tackle LLP can prepare a part-number-based quotation when you provide those details, which prevents comparing an operational kit with an incomplete frame.
Related product
 | AFM8 M22520/2-01 DMC Adjustable Crimping Tools AFM8 ₹61370 The DMC Adjustable Crimping Tool AFM8 is a specialized tool used for crimping electrical terminals and connectors. View product → |
Frequently asked questions
When is the AFM8 M22520/2-01 worth its cost?
It earns its cost when you repeatedly build aerospace, defence, avionics, telecommunications, or other high-reliability harnesses that require controlled contact crimps. It is usually the wrong choice for occasional household wiring, ferrules, insulated terminals, or general repairs.
How do you match the AFM8 to a contact, wire, and connector?
Confirm the contact manufacturer, contact series, wire gauge, conductor type, connector family, and required positioner. The AFM8 frame alone does not make every contact compatible; use the specified turret or positioner and selector setting.
How do you set and use the AFM8 without guessing?
Read the contact or harness specification, install the correct positioner, set the selector to the required value, strip the specified insulation length, insert the conductor fully, and close the ratchet through its complete cycle. Do not choose a setting by appearance alone.
How can you tell whether an AFM8 crimp is acceptable?
Check that the conductor reaches the inspection area, no strands are cut or left outside, insulation is not inside the conductor crimp, the crimp is centred and undamaged, and the contact passes the specified retention or pull test. Use the connector or contact manufacturer’s acceptance criteria.
Should you buy a complete AFM8 system or another crimping tool?
Choose the complete AFM8 system when your work needs interchangeable positioners, repeatable settings, and documented contact-specific results. Choose another tool when you mainly crimp insulated terminals, ferrules, automotive terminals, or mixed everyday connectors.
Keywords